
Operations procedure for ATIONet Stand Alone terminal (Vx520)
| Document information | |
|---|---|
| File: | AN-Stand_AloneTerminalUserManual_EN |
| Document version: | 1.0 |
| Creation date: | August 15, 2015 |
| Author: | ATIONet LLC |
| Change Log | ||
|---|---|---|
| Ver. | Date | Change Summary |
|
1.0 |
August 15, 2015 |
Initial version |
|
1.1 |
February 21, 2017 |
Added terminal parameters section |
- Introduction
- Components
- Change Thermal Paper Roll
- Alphabetic Character Input (Letters)
- Navigation Keys
- Parameters Configuration
- Operative Procedure
- Maintenance Menu
- Configuration menu
Introduction
This manual is aimed to help and guide the user with the ATIONet Stand Alone terminal. ATIONet Stand Alone terminal allows the user to authorize fleet transactions in ATIONet hosts from a simple terminal very similar to the ones used by credit cards.
Components
ATIONet Stand Alone Terminal consists of a single component from which all operations are performed. From now on we will refer to this terminal as POS (Point of Sale). From this terminal operator shall perform all necessary operations, authorize and complete fueling transactions for fleets.
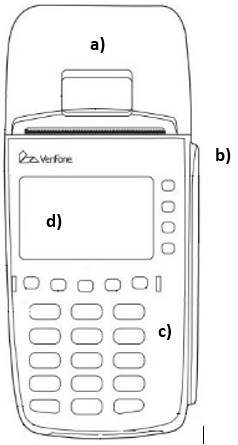
POS parts
a) Paper roll cover
b) Magnetic Stripe Reader
c) Keyboard
d) Display
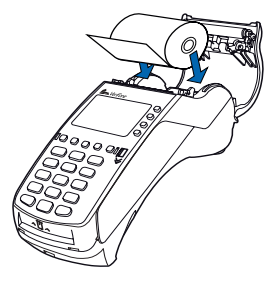
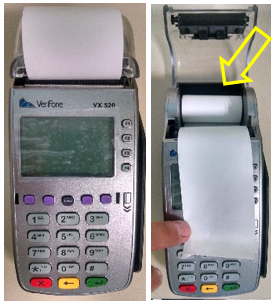
Change Thermal Paper Roll
 |
Prior to process transactions that require a receipt or be recorded, you must install paper in the printer. The POS uses a thermal paper roll of a sheet about 45 cm. Before the end of the roll, on the edge of the paper one red line appears indicating that it is about to finish. After this line appears, it will be enough paper on the roll to complete at least one transaction. |

|
Before operating any electronic system should you take off the gloves, as these can damage equipment. |
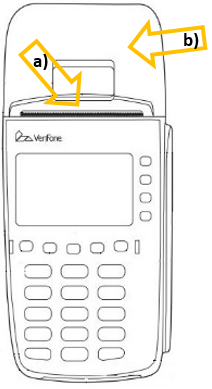
| To change the paper roll proceed as follows: | |
|
Parts a) Printer door latch. b) Printer cover. |
|
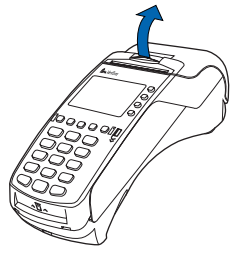
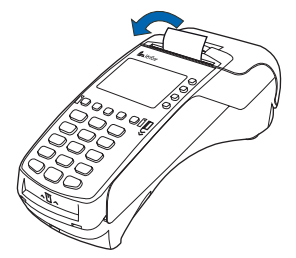
With your finger, gently hold down the latch and pull up to open the paper roll cover. |
|
Remove the used paper roll, if any, from the printer tray by pulling it up. |
|
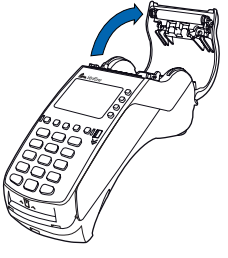
a) Loosen the leading edge by removing the protective strip. b) Roll the paper up to the part without glue residue. c) Hold the roll so the paper feeds from the bottom. d) Let the paper roll fall into the printer tray. e) Pull the paper past the glue residue area. |
|
a) Close the paper roll cover by applying light pressure on it until it clicks, leaving a couple of centimeters of paper. b) Cut the paper into the toothed metal strip printer. |
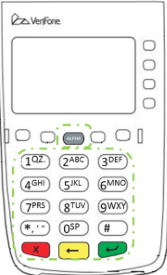
Alphabetic Character Input (Letters)
In general the whole operation of the terminal is done with numeric characters accessible from the keyboard phone type. Occasionally you may need to enter any alphanumeric character (for example by entering a vehicle plate), on those occasions please follow the instructions below:
|
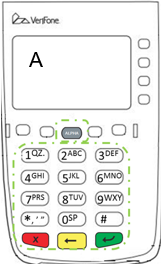
In normal mode, the  [ALPHA] key allows you to enter one of the two or more symbols or characters assigned to the keys on the keyboard (note that this is normal and is specific to the application). [ALPHA] key allows you to enter one of the two or more symbols or characters assigned to the keys on the keyboard (note that this is normal and is specific to the application). Use the [ALPHA] key to enter up to 50 different letters or symbols using the following procedure:
|
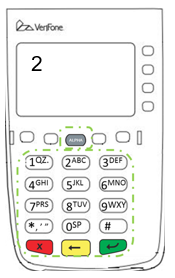 |
Press the key on the keyboard the desired letter or symbol, eg for any of the following [2, A, B or C] press [2]). |
 |
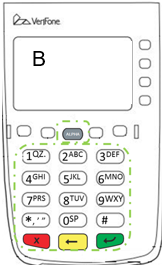
2) Press once the [ALPHA] key to display the first letter, Continuing our example, press the [2] ALPHA key and then to display the letter A.
|
 |
3) If you press the [ALPHA] key again as many times as necessary they unveil the other characters or letters assigned to the key you pressed before ALPHA. For example, press 2 to display the number 2; Press the [ALPHA] key Alpha once to display the letter A, twice to display B, or three times to display C. Pressing alpha once again shows the number 2.
|
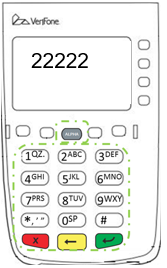 |
Note: If you keep pressing one of the keys on the phone type keyboard without using the [ALPHA] key, the same character repeats until you release it. For example, if you press 2 and hold it down, the screen will display "2222222..."
|
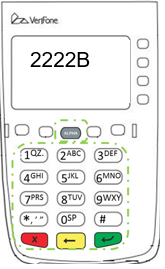 |
If two or more characters are displayed on screen, pressing the [ALPHA] key changes the last character to the next letter, number or symbol on the sequence.
|
Navigation Keys
While operating the POS, you must use the lower color keys for Confirmation (Green), Cancel (Red) or Return (Yellow). Use this keys to return to previous screen or confirm and proceed into the next screen in any of the POS processes.
| Image | Description |
 |
Use the lower color keys to confirm, return or cancel in any of the POS flows. |
Parameters Configuration
Before start using the terminal, its necessary to configure some parameters. To change these parameters follow theses steps:
|
In the main window press F2 and F4 simultaneously. |

|
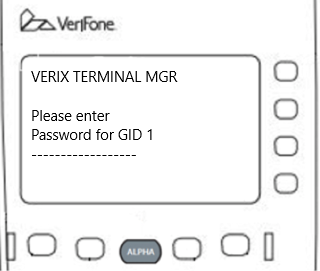
Type: 284647 + enter |
|
Press F2 |

|
Press Enter |
|
Type: 284647 + enter |
|
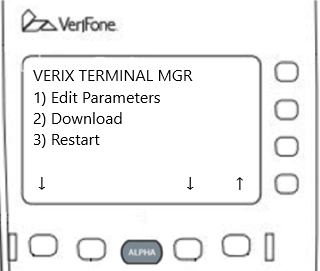
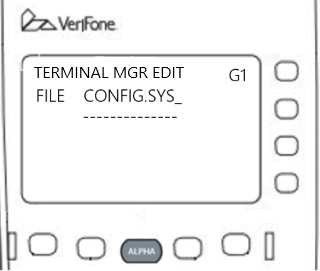
Press enter. Navigate the parameters with the UP and DOWN arrow keys. Select the one you want to modify. check below the complete list of parameters. |
| #TERM_LANGUAGE | Determines the application language. Valid values are: ENG o SPA |
| #TERM_PASSWORD | Supervisor password |
| #TERM_IBUTTON | Turns on iButton reader. Valid values: 1 or 0 |
| #TERM_BARCODE | Turns on barcode reader. Valid values: 1 or 0 |
| #TERM_PROXIMITY | Turns on proximity sensor. Valid values: 1 or 0 |
| #TERM_PINPAD | Turns on the pinpad. Valid values: 1 or 0 |
| #TERM_TRACK1 | Turns on the track 1 printing in the ticket. Valid values: 1 or 0 |
| #TERM_TRACK1LABEL | Defines the title for the Track 1 in the ticket. |
| #TERM_DHCP=1 | Turns on the DHCP. Valid values: 1 or 0 |
| #TERM_IP | Terminal IP (if set the TERM_DHCP parameter is ignored) |
| #TERM_SUBNETMASK | Terminal subnet mask |
| #TERM_GATEWAY | Terminal network gateway |
| #TERM_DNSPRI | Terminal primary DNS |
| #TERM_DNSSEC | Terminal secondary DNS |
| #AN_DEFAULTPROMPT | Turns on the prompt usage |
| #AN_DRIVERID | Turns on the driver id prompt |
| #AN_VEHICLEID | Turns on the Vehicle Id prompt |
| #AN_ODOMETER | Turns on the odometer prompt |
| #AN_ENGINEHOURS | Turns on the orometer prompt |
| #AN_TRAILER | Turns on the trailer prompt |
| #AN_MISCELLANEOUS | Turns on the miscelaneous prompt |
| #AN_TRUCKUNIT | Turns on the truck unit prompt |
| #AN_SECONDARYTRACK | Turns on the secondary track prompt |
| #AN_PRIMARYPIN | Turns on the primary PIN prompt |
| #AN_SECONDARYPIN | Turns on the secondary PIN prompt |
| #AN_URL | Ationet API URL. Valid values: native.ationet.com , native-beta.ationet.com o native-test.ationet.com |
| #AN_PORT | Ationet API port. This value MUST be 80 |
| #AN_TERMINALID | Terminal Id, previuously configured in the portal. |
| #AN_LOCALAGENT | Turns on the Local Agent usage. Valid values: 1 or 0 |
| #AN_LAPORT | Ationet Local Agent port. This value MUST be 33173 |
| #AN_LAIP | Ationet Local Agent IP |
Operative Procedure
|
BEFORE OPERATING THE ELECTRONIC SYSTEM, YOU MUST REMOVE THE GLOVES, AS THESE CAN DAMAGE THE EQUIPMENT. FOR THE OPERATION OF THE ELECTRONIC EQUIPMENT (REGISTRATION AND POS TERMINALS) THE OPERATOR OR PERSON TO HANDLE SHOULD REMOVE THE PROTECTIVE GLOVES. |
 |
Before proceeding with the transaction, validate that the POS terminal has enough paper to print the tickets. If it doesn't, review the "Change Thermal Paper Roll" section. |
|
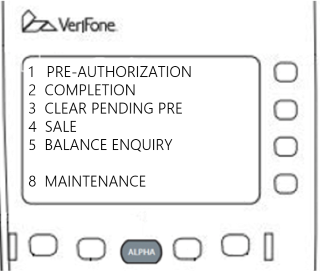
Once the system has been turned on, the POS shows the principal menu options to start operating. Select the desired option using the following criteria: 1. To begin a transaction and ask the server a pre-authorization for the release. 2. Once the transaction has been done, report the system the final value of it. 3. If for some reason the customer withdrew the operation, release the balance using this option. 4. Report a sale without prior authorization. 5. To view the available balance before starting a transaction. 8. To perform maintenance tasks. |
Pre-Authorization:
During normal operation the transaction is divided into two operations. First a pre-authorization is done from the POS to obtain the authorization to continue with the transaction and the amount of the maximum dispatch. After the dispatch has been done, the confirmation takes place, in which the real amount is reported. The pre-authorization involves communication with the central system and retrieval of the balance that it authorizes. Also, capturing this balance implies that it can not be used simultaneously from elsewhere. This means that ALWAYS, after a pre-authorization, should be an acknowledgment (Menu Option 2) or Pre Pend Delete (Menu Option 3) performed to update the balance in the central system. Start Pre-authorization pressing the option (1) on the keyboard and follow the instructions below:
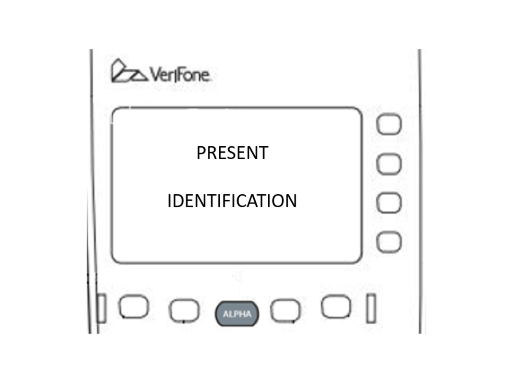 |
Select option 1 form the menu to make a pre-authorization and start operating. Or you can press ALPHA button and type de identification. |
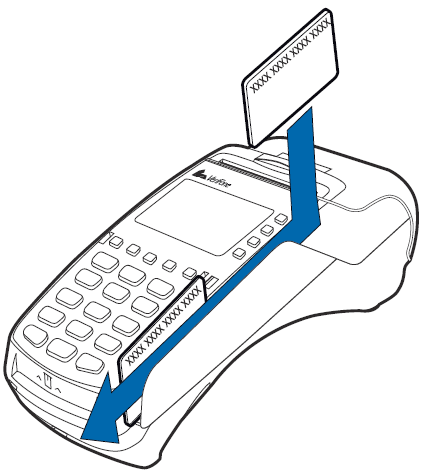 |
The card that was assigned to the vehicle should be slided from top to bottom in the terminal slot reader with the magnetic stripe (brown or black) facing the computer screen. After sliding the card, the POS will request data about the dispatch to continue with the transaction. |
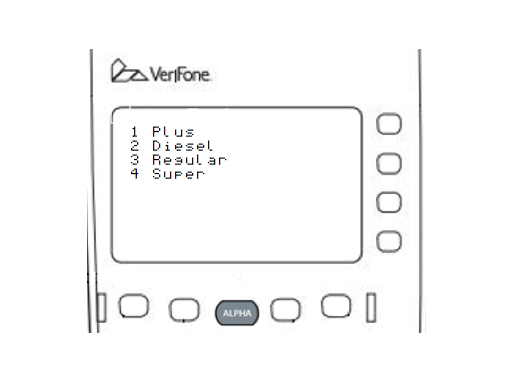 |
Select the number corresponding to the product that you intent to dispatch. |
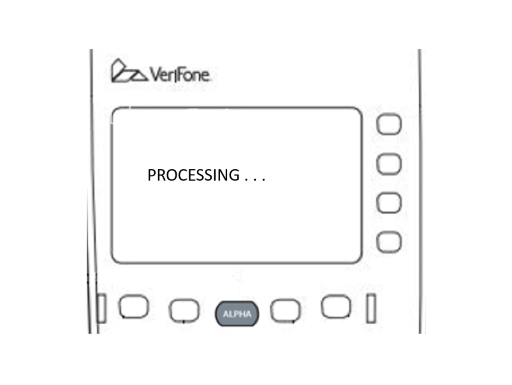 |
Once all the data has been responded, the POS will display the message "Processing..." while communicating with the central system to request authorization. |
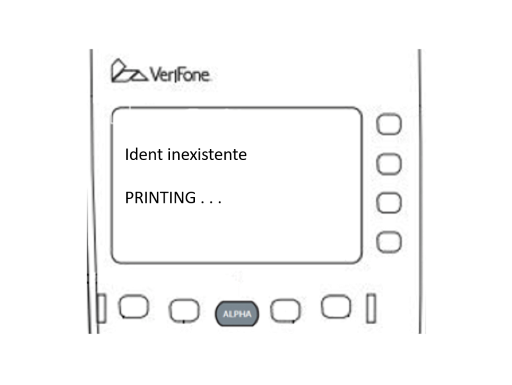 |
If the transaction is unauthorized the system will respond with an error message indicating this while the terminal prints a ticket. In the example: "ID nonexistent". Please refer to Annex errors at the end of this document for details. |
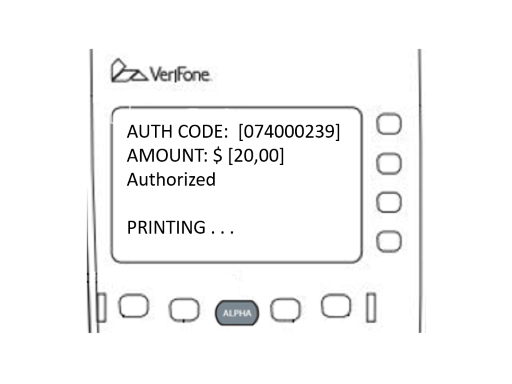 |
If the transaction is authorized the system will respond with a confirmation message like the example while the terminal prints an authorization ticket. The ticket indicates the authorized amount to dispatch for that identifier in that transaction. Proceed with the dispatch following the indicated on the ticket. |
Confirmation:
Upon completion of the dispatch it is necessary to confirm the transaction in the system. To do this, choose option 2 of the main menu and follow the instructions. Start the confirmation by pressing the option (2) on the keyboard and then follow the instructions below:
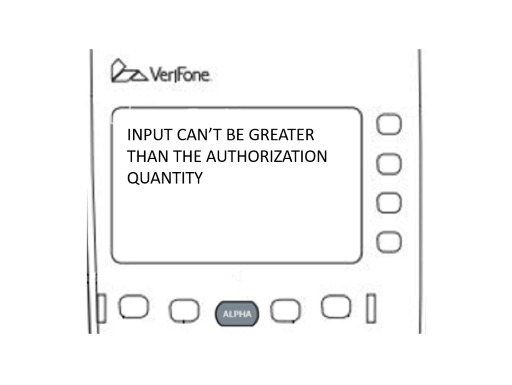 |
Remember that the dispatched amount can not exceed the authorized amount in the pre-authorization. If you enter an amount greater than the pre-authorized you will receive an error message and the transaction will NOT be confirmed. Press the green button to re-enter the correct amount. |
 |
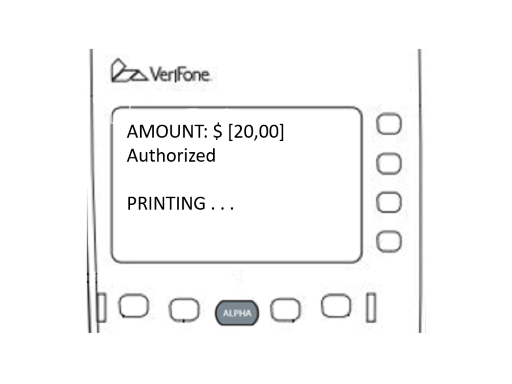
If the data entered is correct the operation will be confirmed on the server. The display will show the message OPERATION COMPLETED and the POS will print the ticket of the transaction. This first copy of the ticket is for the station and is normally requested to be signed by the Customer. |
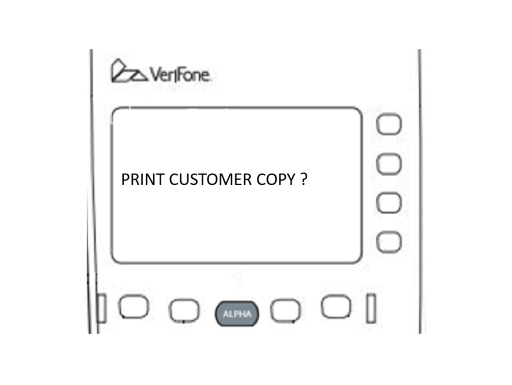 |
Then the POS will offer to print a second copy for the client. Press the green button to print or the red button to not do so. |
Pre Pending Delete:
If for some reason there has been made one or more pre-authorizations and the corresponding dispatches have not been performed, it will be necessary to release the balance of these pre-authorizations to normalize the balance of the account. To do this press option (3) in the main menu and follow the instructions below:
|
The POS will ask to present the identification that is associated to the pre-authorization to be canceled. Or you can press the ALPHA button and type the identification Slide through the reader the same card you used to apply for pre-authorization. |
 |
The card that was assigned to the vehicle should now be slided through the slot reader terminal with the magnetic stripe (brown or black) facing the POS screen. |
|
After reading the card, the terminal displays "Processing..." while communicating with the central systems to cancel the pre- authorization. |
|
When the server has responded confirming the cancellation of the pre-authorization the screen displays a confirmation message. The balance of the pre-authorization is now available for use. |
Sale:
Under some circumstances it may be the case that the sale has already been made and the dispatch was completed without following the normal flow of pre-authorization and confirmation. In that case, to enter the sale into the system, you will need to use option 4 from the main menu: SALE. It is important to note that when processing a sale the system will apply the same restrictions that had been applied in a pre-authorization, therefore, if you try to enter a sale for an amount or volume that is not authorized for that identifier at the time, the sale will be rejected. If this happens it will be necessary to contact the help desk to determine how to proceed with the sale. To enter a sale press option (4) in the main menu and follow the instructions below:
|
The POS will ask to present the identification associated with the sale to be informed. Or you can press the ALPHA button and type the identification Slice through the reader the fleet card. |
|
The card that was assigned to the vehicle should be slided through the slot reader terminal with the magnetic stripe (brown or black) facing the POS screen. |
|
After reading the card, the terminal displays "Processing..." while communicating with the central systems to report the sale. |
|
If the transaction is unauthorized the system will respond with an error message indicating this and will print a ticket. In the example: "ID nonexistent". Please refer to Annex errors at the end of this document for details. |
|
If the data entered is correct the operation will be confirmed on the server. The display will show the message OPERATION COMPLETED and the POS will print the ticket of the transaction. This first copy of the ticket is for the station and is normally requested to be signed by the Customer. |
|
If the transaction is authorized the system will respond with a confirmation message like the example and will print an authorization ticket. |
|
Then the POS will offer to print a second copy for the client. Press the green button to print or the red button to not do so. |
Balance enquiry:
This transaction indicates the maximum that can be dispatched in the next transaction to a specific identifier. Perform this query when the limits of the vehicle involved are unknown to avoid making multiple attempts of pre-authorization that can be denied. If the reported balance does not correspond with the amount the Customer believes he has, it is necessary to contact the help desk to determine how to proceed. To make a balance enquiry press option (5) in the main menu and follow the instructions:
|
Select Menu Option 5 for a balance enquiry and start operating. |
|
The card whose balance you desire to check should be slided throught the slot reader with the magnetic stripe (brown or black) facing the POS screen. Or press the ALPHA button and type the identification. |
|
After reading the card, the terminal displays "Processing..." while communicating with the central systems to check the balance. |
 |
The system responds with the maximum amount available for dispatch. It is shown on screen and the POS also prints a ticket with such information. |
Maintenance Menu:
The Maintenance menu provides access to system operations that are not directly related to the operation of the same transaction. That is, operations that are not made with the same frequency as those for processing transactions in the system. This menu includes four options:
1.Batch close
2.Reprint last
3.Void transaction
8.System Configuration: From this menu option, system operating parameters are set.
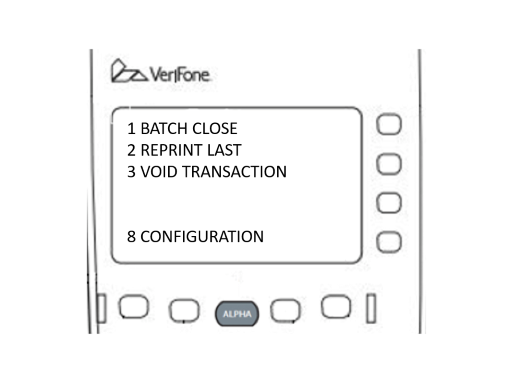 |
The POS will ask the user to choose one of the following options. |
Batch close:
This concept allows grouping a set of transactions for further analysis and processing convalescence. Usually, it is recommended to perform a batch close for each closing operating shift at the station. This way you can easily reconcile transactions that were paid with any of the means of payment processed by ATIONET. To do this press option (1) in the maintenance menu and follow the instructions below:
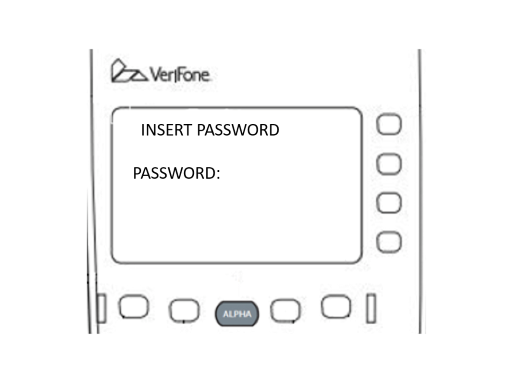 |
In order to proceed with the batch close, you require supervisor permits. Please enter the supervisor password. |
|
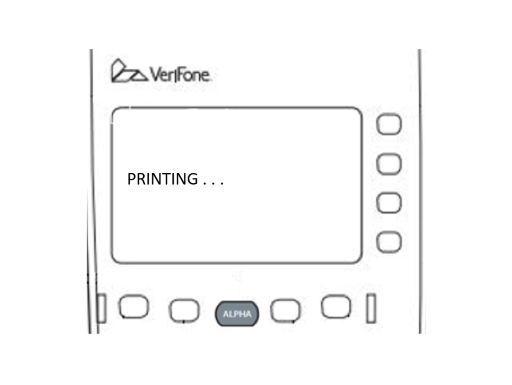
The POS will ask the Central System to close a batch and process it. During that process, "PROCESSING..." is displayed on screen. |
|
When the process finishes the POS displays a message indicating and prints the closure ticket. |
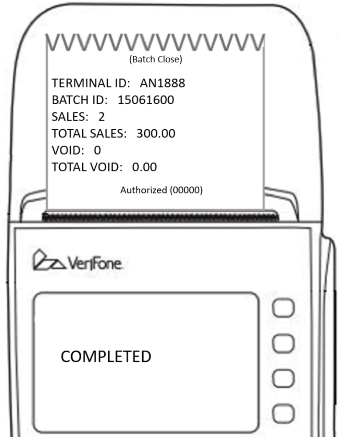 |
The closure ticket includes a unique identification number generated by the server, the number of processed transactions from the last close, the total sales, cancellations and acumulated amount during the period. |
Reprint last:
If for some reason it is necessary to reprint the last ticket issued (typically when the printer paper is locked), this can be done from this menu. To do this press option (2) in the maintenance menu and follow the instructions below:
 |
The POS will automatically print a copy of the last receipt issued. You can not re-print any other ticket. |
|
Then the POS will offer to print a second copy for the client. Press the green button to print or the red button to not do so. |
Void transaction:
If there is an error while processing a transaction in the system and the turn still has not been closed, this option can be used to override it and process it properly. For do it again press the option (3) in the maintenance menu and follow the following instructions:
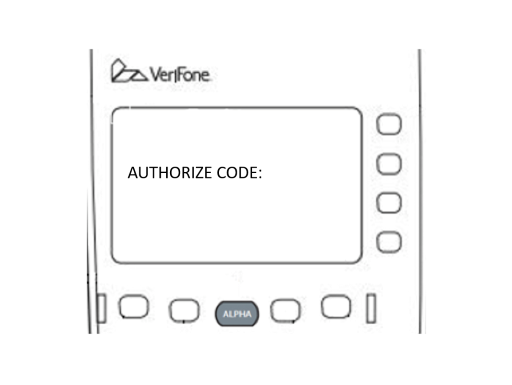 |
The POS will request the authorization code of the transaction to be canceled. You can find the authorization code in the ticket. Press the green button to process the void transaction. |
|
The POS will ask the system to annul the transaction. During that process, "PROCESSING..." will be displayed on screen. |
|
Upon completion of the annulment process correctly, the POS displays a message indicating so and prints a confirmation ticket or an error one if the process had failed. |
Configuration menu:
Configuration menu provides access to modify POS parameters. These operations are not common and require in all cases Supervisor password. This menu includes two options:
1) Supervisor password
2) Other Products
To enter the Configuration Menu press option (8) in the maintenance menu.
Supervisor password:
To change the supervisor password assigned press the button (1) in the Configuration menu and follow the instructions below:
|
Enter the current password to perform this function. Press the green button to confirm. |
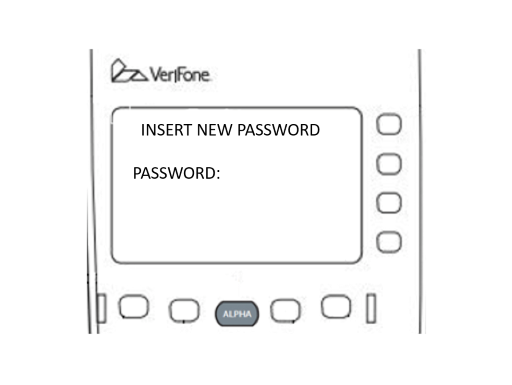 |
Insert new password and press the green key to continue. |
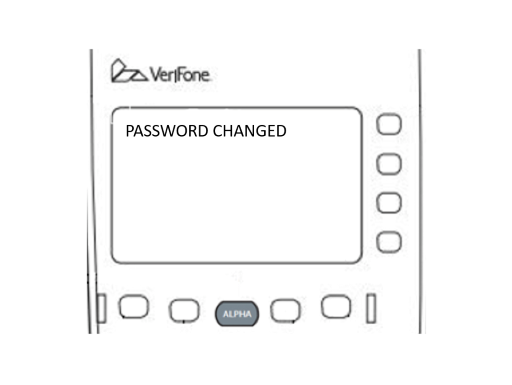 |
Upon completion of the password changing process the POS will display a confirmation message or an error if the process had failed. |